Sunday, 23 September 2018

DM4 Restoration

A Dundas 4-wheel Coach Restoration 

Completed restoration

The early Dundas 4-wheel coach below once belonged to Norfolk 009 Group co-founder Ray Fothergill.  It is one of the only items I have from his "Fother Valley Railway", after he sadly died in about 2011.


The coach is a DM4 and dates from about 1981 when Dundas had just started,  it has the white metal sole bars and gives the coach a nice bit of weight.
What would we have done without Dundas Models?

So I thought it was about time I did the right thing and re-painted it for use on Shortwaite Hill, which I am sure he would have liked.


I did think about trying to strip the body, but as I've never attempted this before, from plastic anyway,  I took the easy way out and carefully sanded the panels with 500 grit foam-backed paper.

Here is the completed coach before adding weathering.

I added some seats and seated passengers, re-glazed it, and retained the original roof adding new rain strips and gas lamp tops.  I am having a dilemma concerning which couplings to use for the stock, and at the moment it is fitted with "period" Peco GR-101 couplings with a loop only on one end of the vehicle.
For the SHLR livery I played around with brown, cream and tan colours but decided to use Humbrol 133 "brown" and 71 "oak" cream.


Friday, 21 September 2018

Shortwaite Hill Tunnels Mouths etc.

Tunnel Mouths etc.

The tunnel entrance under the upper station.

I have made one or two walls and tunnel mouths for "Shortwaite Hill" this week. 
Built usually with Wills Coarse Stone sheets, I have added capping stones from thick plasticard.  The above tunnel entrance has a girder support, and Ratio Double Rail Stanchions added between the pillars.  The stonework is painted with a mix of Humbrol matt 121 and 29, then after 48 hours drying time, thinned Humbrol 28 is washed over to collect in the mortar joints, and also thinned Humbrol 75 used for the mossy corners and damp mortar and stones, this is all rubbed off the stones with a lightly turps-soaked rag, to leave the mortar lines in the joints.  Dry-brushed matt 80 is also used for more moss effects.

Left-hand tunnel mouth made with sanded Wills Coarse Stone and also uses Peco N gauge wing walls from an NB33 kit.  It is the entrance to the hidden gradient.

 Right-hand tunnel mouth made with sanded Wills Coarse stone and also uses Peco N gauge wing walls from an NB33 kit.  The upper bridge, which spans the line running under the village is a modified NB33 Bridge Side.

This structure is going to be the bottom of the lane which passes cottages.  

A stone wall which borders the railway line on it's scenic ascent.  The track at right angles will be inside a goods shed, accessed by a wagon turntable.


Monday, 10 September 2018

Shortwaite Hill

Shortwaite Hill

(22nd layout)

There comes a time when one has to get things off one's chest.......

The Minitrains Bagnall Wing Tank 0-4-0 (as new), part of the catalyst to try something different.

Plan "S34*" has always appealed to me, and quite recently several others have used the plan as a basis for a 009 scale layout.  Then I saw Mr Tincknell's "Return to the 70's" layout which was based on the same track plan.  For me, it was quite inspirational with the well-modelled buildings in a Northern England setting, much like the Yorkshire Dales.  I never got round to my own project though, fearing that it would be labelled as "un- prototypical", or worse still, called a "rabbit warren", which I don't think it is.

* (S34 - in the PECO 60 Plans for Small Railways booklet)

Then, the Minitrains Bagnall Wing Tank appeared on the market, the perfect little loco to run on it.  But, economy had to be the watch word here.  We haven't all got a bottomless pit of money, so I sold some books and die cast buses that I did not need, and hey-presto the Bagnall has arrived, along with some new irregular sleepered track.

So, why not try to build it, or my version of the S34 track plan?

It's been adapted slightly to what I require, mainly, in that the return loop has gone, and in place of it is a line returning to the lower level so it can be run as a continuous run if required.

"Shortwaite Hill" - bare baseboard and track with point controls being installed.

It's certainly not easy to build.  My version is 44" x 24" (because that's the size of the 6mm plywood I had in the garage that was spare) - it is slightly smaller than the original plan.  It is necessary to decide on a, not too high, measurement for the high level, the higher you make it, the steeper the gradients and the more the locos will struggle.  I chose 50mm as the height, plus the thickness of the 6mm ply-wood.  The gradients have to be gradual and consistent, especially at the top and bottom of the run.  There also has to be enough clearance underneath the high level baseboard at various points, and allowances where the point rods are run.  I thought an important provision was to have access to the hidden tracks for cleaning, and to recover accidents.  Then there is the point control itself, mine is wire-in-tube which brings new problems, especially when you have a long descending gradient behind the back scene, and tubes under the high level base making the clearance less at odd points.

"Shortwaite Hill" will be another North Yorkshire style layout.  It's not an enthusiasts layout, but I'll see where it all goes...
  

Friday, 3 August 2018

New 009 Models/3 Tram No.2

Just recently I have built a new tram for the layout - No.2, which is inspired by the Alford & Sutton Tramway's Black Hawthorn tram locomotive.


I built the loco on a Kato 4 wheeled tram chassis, here is the base plate with one or two added cab details from bits of plasticard and brass tube.  The chimney was later enhanced with a copper cap.


Above is the body under construction using more plasticard.


... and the completed locomotive.  The lamps are from RT Models and the bell is a reproduction Hornby item sold on Ebay.


Here is a photo along with No.1, the Kitson style tram loco built earlier.  The "SNT" stands for the newly named tramway "The Stakesby & Newholm Tramway Co."

Sunday, 22 July 2018

New 009 Models/2: Station building and first goods vehicle


Station Building

Just recently I built a station building using the Ratio Grand Junction L&NWR components:-


I shortened the panels by two planks along the top of the panels and also added a pitched roof using Wills Slates, and a valanced canopy and chimney.  It looks in proportion with the tram loco and coaches already built.

Van


I bought from this goods van from the 009 Society Sales stand.  It is a shortened Bemo 2002 6-wheeled van, and nicely matches the tram too.  I think I am going to buy one or two of the Dundas Irish goods vehicles as they will look in keeping with the stock already built.  

Monday, 9 July 2018

New 009 models/1: 4-wheeled coaches and baseboard

New 009 Models/1

Three passenger coaches to start the rolling stock ball rolling. 
Dundas Models DM28's, and a DM29 with the guards compartment modification.  I have added clerestories to the two single compartment coaches.  Roof's are not yet fixed as I have to add passengers.

Although the weather here has been so hot, I have built a few items to go with the tram.  Three 4w passenger coaches (as photograph above) a station building, and a baseboard. A few goods vehicles are on the list next and hopefully a scratch built tram loco.

Livery for the coaches and the tram engine is Revell 350 satin "Dark Blue", Humbrol 71 satin "Oak" cream, and for the lining Humbrol 132 satin "Red".  I have always brush painted.


The baseboard that has been recently made, in the hope that a model railway will appear on it one day.  In two sections, it is 7ft long by a little under 2ft wide.  


The fiddle yard will be behind the angled back scene board.  In front of this is planned a town street with market, the line running through a town gate into a more country type scene running beside a road.  A station will be at the back of the deeper board with station building, engine shed and goods shed.

Tuesday, 12 June 2018

A Diversion Back

A diversion back

009 Kitson Steam Tram

So what happens when you are suddenly and acutely aware of a lack of space to keep building and storing these large scale models?

An inspirational trip to the Beds & Bucks Narrow Gauge Modellers Open Day at Barton-le-Clay in May started to answer that question.  There were several great 009 layouts exhibited there - wonderful modelling.

Then I found some old Railway Modeller pages with an article that has kept bugging me for many years.  It was H0e scale, it ran steam trams along a town street, then ran out into the country.  I saw a  smaller version of the same layout exhibited at ExpoNG in 2007 - "Pontevedro" by Don Sibley.  A glance at some steam trams running in Britain and Ireland, especially the short-lived Alford & Sutton line, pushed me into building this Kitson (non-condensing) 009 scale steam tram.

During it's build, I seem to spend more time losing, then trying to find small bits of plastic, I don't know whether that's because I had been building larger scale stuff for the past two years, or my even- older age!

The body is a Shapeways 3d print, with scratch built skirt and boiler, running on the inevitable Kato tram chassis plus some added white metal details.  I noticed that the tram "skirt" on this body was far too shallow so I cut it off made my own slightly deeper version.  Also, when I obtained the body I noticed the side window openings didn't have the arched tops, so these were filed too.

  The 3D printed body and the skirt fitting over the chassis.

Mock boiler under construction.

I have bought a few rolling stock kits from Dundas Models to go with the tram.  I will just see how it all goes.

Completed tram without the railway title lettering which I have yet to decide.  It is pictured on a baseboard made from spare ply wood in the form of  the original "Pontevedro" - all pretty hopeful, but we'll see what happens. 

Wednesday, 23 May 2018

Railcar - No.7

Railcar No.7 "Bay"

I wondered if it was possible to build a fictitious IC railcar on a Hornby 0-4-0 chassis. Whatever type of body I built (to seat for example 4 - 6 persons) it would have overhangs at each end which would have to be kept to a minimum.  So I did a rough sketch of a small railcar and set about cutting-out the body parts.

Here are the body parts along with a second hand re-wheeled Hornby 06 shunter chassis.  The window apertures looked too big at first, but any prototype would have framing and beading to hold in the glazing, so I added these to the inside of the body sides.

A couple of days later it looked like this.

Seats, drivers partition, throttle lever and brakes in the cab, dummy frames, a silencer and exhaust were all made from bits and pieces of plastic.

 After glazing and painting it started to look more like a possible nippy little vehicle.

I altered a cheap Chinese figure for the driver, and painted some passengers to fit in the vehicle.  A roof was made from some birch hardwood, sanded and shaped to the approximate roof curvature's which was harder to do than expected.


The above three pictures show the complete vehicle on test near the maintenance shed.  As yet though I have to find a suitable headlight for it.  Roof horns were carved from scrap plastic tube.
Named "Bay" it is a meaning (Vietnamese origin I think) for the seventh born son.


Tuesday, 24 April 2018

So what next?

My first Gn15 loco "Proteus" leaves Fox Gill with a goods train.

So, I have built my planned layout, what to do next?  

I have several wagon kits in the drawer waiting to be built, but at the moment I have an idea to build a small rail car, if that is possible.  I would like to do another small operating diorama to attach to the Maintenance Shed board which would then give it more operating potential, and I have a plan for this.  Then, in the future I would love to build a series of Gn15 "modules", these are partly planned but need many trials an measurements to find the ideal size for such a system.  It was easy in the small scale 009 days, but in 1:24 it is a different matter.

Here are one or two photos I took recently of "Longstone".  The next exhibition for the layout will be at the Beds & Bucks Narrow Gauge Modellers Open Day on Sunday May 13th 2018 at Barton Le Clay Village Hall, Hexton Road, Barton, MK45 4JY. 

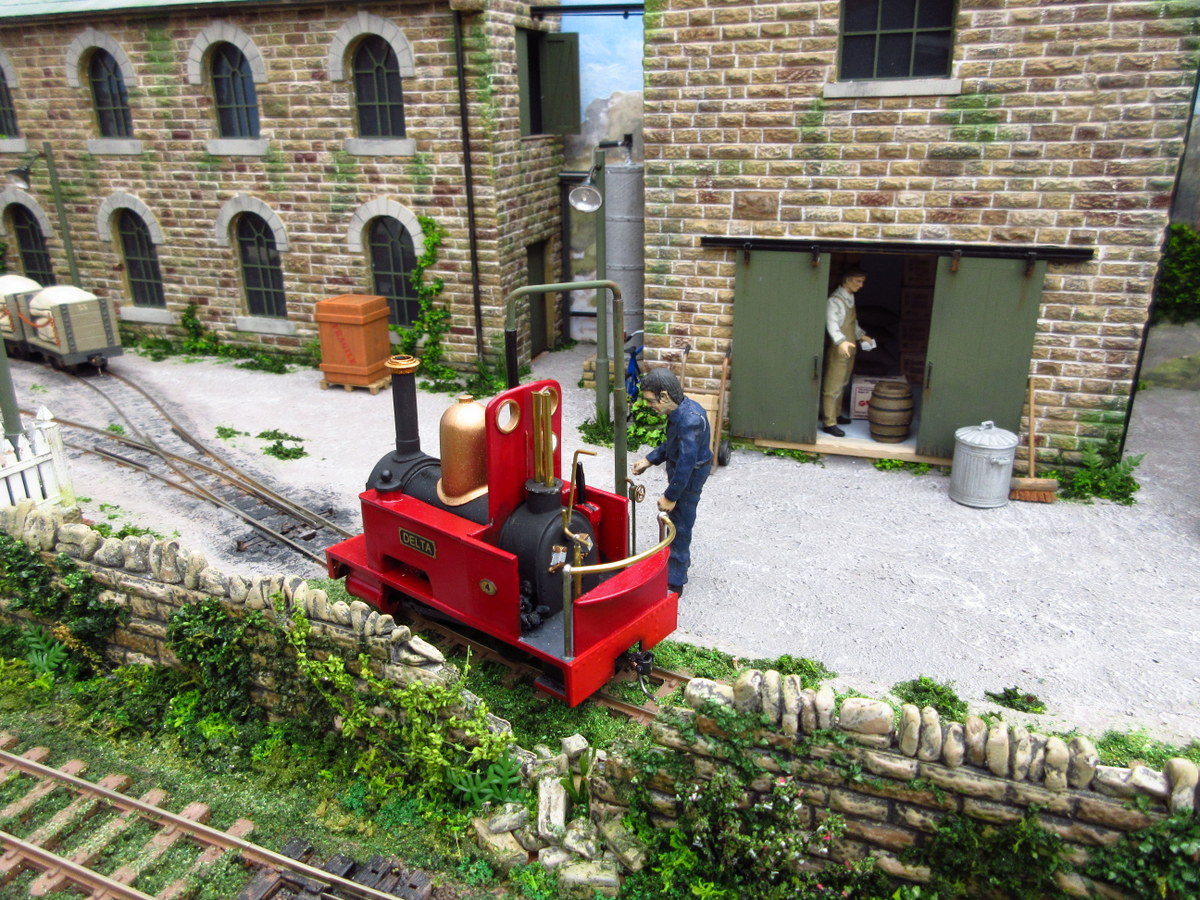
"Delta" seen near the chapel hauling two vans into the village. 

No.1 "Proteus" arriving at the station with a passenger train.

No.5 "Quinto" stopping at the Mill halt to pick-up the works foreman.

"Delta" takes on water in the mill yard.

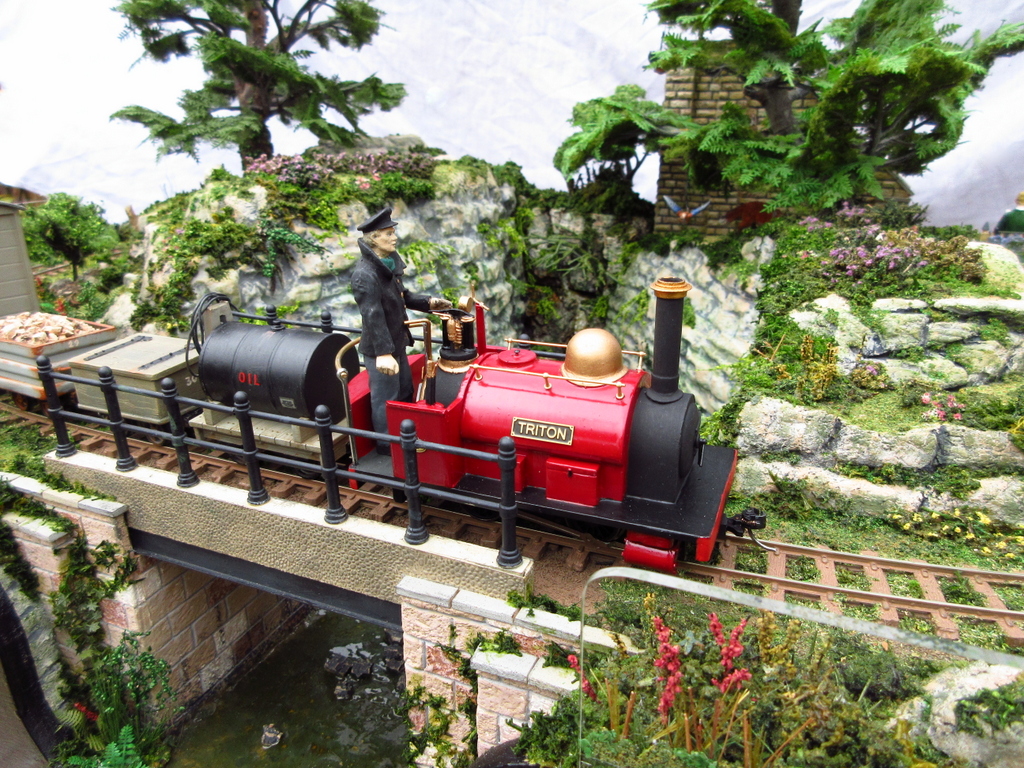
Passing over Fox Gill bridge is No.3 "Triton" with a mixed goods.

Friday, 6 April 2018

Locomotives for Longstone

Locomotives

Loco's 1, 2 & 3 at the maintenance shed.

As I may have mentioned, it was a picture of a Smallbrook "Harlequin" kit in the Railway Modeller magazine that started me off in 1:24 (Gn15) scale modelling, and then constructing a layout.  I very unusually strayed away from my beloved 009 models to try something different.  As I was beginning in a new scale, I didn't know what the kits for Gn15 were like to build.  All I knew was, that there were locomotives by Smallbrook Studio, they were resin cast, with brass details and needed a cheap Hornby chassis.  It was probably this fact...that they were reasonably priced...as to why I swayed towards having a go, because 009 scale locos had become quite expensive.

All the Gn15 loco kits were in the region of £50, with the chassis costing between £15 and £25 extra depending if you bought a second hand example or a new one.  With a few pounds spent on nameplates and Kadee couplings they are still cheap models, and fairly easy to build.  Many Gn15 modellers are interested in small diesel works locos, but I preferred steam engines.  I have five locomotives so far, all Smallbrook kits, but hope to build something different soon.

All the locos are brush painted, in grey primer first, then using a mixed cherry red colour, part satin/part gloss for top coats.

The first loco under construction showing the resin body before the brass details were added.
Glued together with Loctite Super Glue as recommended in the instructions.  I use the little "Mini Trio" tubes as there seems to be less waste.

The third loco "Triton" before being painted.

The fifth loco "Quinto" under construction.

No.1 "Proteus" is a Harlequin kit.  As it was the first one I had built, I made a few mistakes along the way, I used the wrong sized brass wire for some of the cab details, and promptly ran out of it, meaning I had to ask Michael at Smallbrook if he could send me some more bits, which he kindly did.  When I had made it, I knocked the loco off my desk breaking off the chimney, damaging the handrails and the brake handle, so I had to get more bits!  After all the time modelling little scale locos and rolling stock, you have to get used to handling the larger models, and I regularly accidentally catch a loco and knock it over. 
The chassis I used for this loco is the latest Chinese Hornby Class "0F" chassis, but the underside of the boiler only has recesses for the earlier model (which has less electrical components on), so it was quite a squeeze to get in, and some of the underside of the boiler had to be drilled out carefully.   The saddle tank is weighted with lead so it it quite top heavy.  

No.2 "Jiro" is a Columbine kit.  Very easy to build, that is, unless you are taking a high dose of tablets at the time, like I was, which leads to things "not going on very straight"!  There are only a dozen or so cast resin parts, the footplate, boiler, tanks (which have lead beads in them for added weight), cylinder covers, cab front and back, cab sides, brake lever, dome and chimney, and a few small brass parts some of which you have to cut and bend.

No.3 "Triton" is a Pierrot kit and quite a small loco.  The design is based on a Hunslet "Alice" class loco.  There are many extra detail parts in the cab on this model, some quite fiddly to do.

No.4 "Delta", is another Columbine kit.  To distinguish it from the other Columbine, I painted the boiler barrel black.  Luckily, I wasn't on too many drugs this time.

No.5 "Quinto", a Katie kit.  Based on the design Sir Arthur Heywood built for the Duke of Westminister for his estate at Eaton Hall.  However, I changed the front and rear cab sheets by making new parts from plasticard, which many Heywood followers would not appreciate.  I just wanted something that looked "beefier".  The Roscoe lubricator attached to the smoke box has to be handled and cleaned-up very carefully, otherwise it will break (like mine did).

Link to: Smallbrook Studio Heywood kits (by the way, I have no attachment to this firm other than as a satisfied customer).

That's about it at the moment for the locomotives.  I would like to build one or two different new locos in the near future, but I will have to wait and see what develops.

Tuesday, 27 March 2018

Wagons for Longstone

Wagons for Longstone


There are several wagon kits for sale in the Smallbrook Studio and Sidelines ranges and I have collected a few of them (some still to be made) for use on Longstone.

These kits are usually made of resin and are supplied with wheels.  In the case of Smallbrook Studios  they come with tension lock couplings.  I have continued to replace the couplings with Kadee's.  The kits are basically a body moulding, chassis frame moulding, and wheels, - very simple to make.

The mouldings are thoroughly washed to clean off any residue, then glued together with superglue.  I have used Humbrol enamel primer, then Humbrol enamel matt top coats with added weathering, but I believe good quality acrylic paints can also be used.

 The Sidelines three plank open wagon kit.  Cleanly moulded and easy to assemble.

Vehicle No's 21 and 22 are Sidelines SL501 Covered Vans.

3-plank open wagons No's 25 and 26 are Smallbrook Studio kits running on "00" scale Dapol 10ft chassis. 

No. 29. This steel mineral wagon, which I bought ready-made from a friend may be a Rockley Bottom product from a few years ago.


No.30, A Tool Chest wagon, possibly from the same manufacturer.


No's 31 - 38.  Bulkhead Flat wagons made by Sidelines (SL201).


No.40, a Sidelines SL103 Tool wagon.


I bought this wagon, No.41 from Ebay and I believe it to be a Shapeways product.

No.42, a single plank version of the above.

No. 46, a old Sidelines SL502 3-plank wagon.


No.50 an old Sidelines SL500 flat wagon.


Another Sidelines model, SL007 Tank wagon, as yet to be numbered.


I hope to add a few more wagons to the LWR stock in the next few months.