Tuesday, 24 April 2018

So what next?

My first Gn15 loco "Proteus" leaves Fox Gill with a goods train.

So, I have built my planned layout, what to do next?  

I have several wagon kits in the drawer waiting to be built, but at the moment I have an idea to build a small rail car, if that is possible.  I would like to do another small operating diorama to attach to the Maintenance Shed board which would then give it more operating potential, and I have a plan for this.  Then, in the future I would love to build a series of Gn15 "modules", these are partly planned but need many trials an measurements to find the ideal size for such a system.  It was easy in the small scale 009 days, but in 1:24 it is a different matter.

Here are one or two photos I took recently of "Longstone".  The next exhibition for the layout will be at the Beds & Bucks Narrow Gauge Modellers Open Day on Sunday May 13th 2018 at Barton Le Clay Village Hall, Hexton Road, Barton, MK45 4JY. 

"Delta" seen near the chapel hauling two vans into the village. 

No.1 "Proteus" arriving at the station with a passenger train.

No.5 "Quinto" stopping at the Mill halt to pick-up the works foreman.

"Delta" takes on water in the mill yard.

Passing over Fox Gill bridge is No.3 "Triton" with a mixed goods.

Friday, 6 April 2018

Locomotives for Longstone

Locomotives

Loco's 1, 2 & 3 at the maintenance shed.

As I may have mentioned, it was a picture of a Smallbrook "Harlequin" kit in the Railway Modeller magazine that started me off in 1:24 (Gn15) scale modelling, and then constructing a layout.  I very unusually strayed away from my beloved 009 models to try something different.  As I was beginning in a new scale, I didn't know what the kits for Gn15 were like to build.  All I knew was, that there were locomotives by Smallbrook Studio, they were resin cast, with brass details and needed a cheap Hornby chassis.  It was probably this fact...that they were reasonably priced...as to why I swayed towards having a go, because 009 scale locos had become quite expensive.

All the Gn15 loco kits were in the region of £50, with the chassis costing between £15 and £25 extra depending if you bought a second hand example or a new one.  With a few pounds spent on nameplates and Kadee couplings they are still cheap models, and fairly easy to build.  Many Gn15 modellers are interested in small diesel works locos, but I preferred steam engines.  I have five locomotives so far, all Smallbrook kits, but hope to build something different soon.

All the locos are brush painted, in grey primer first, then using a mixed cherry red colour, part satin/part gloss for top coats.

The first loco under construction showing the resin body before the brass details were added.
Glued together with Loctite Super Glue as recommended in the instructions.  I use the little "Mini Trio" tubes as there seems to be less waste.

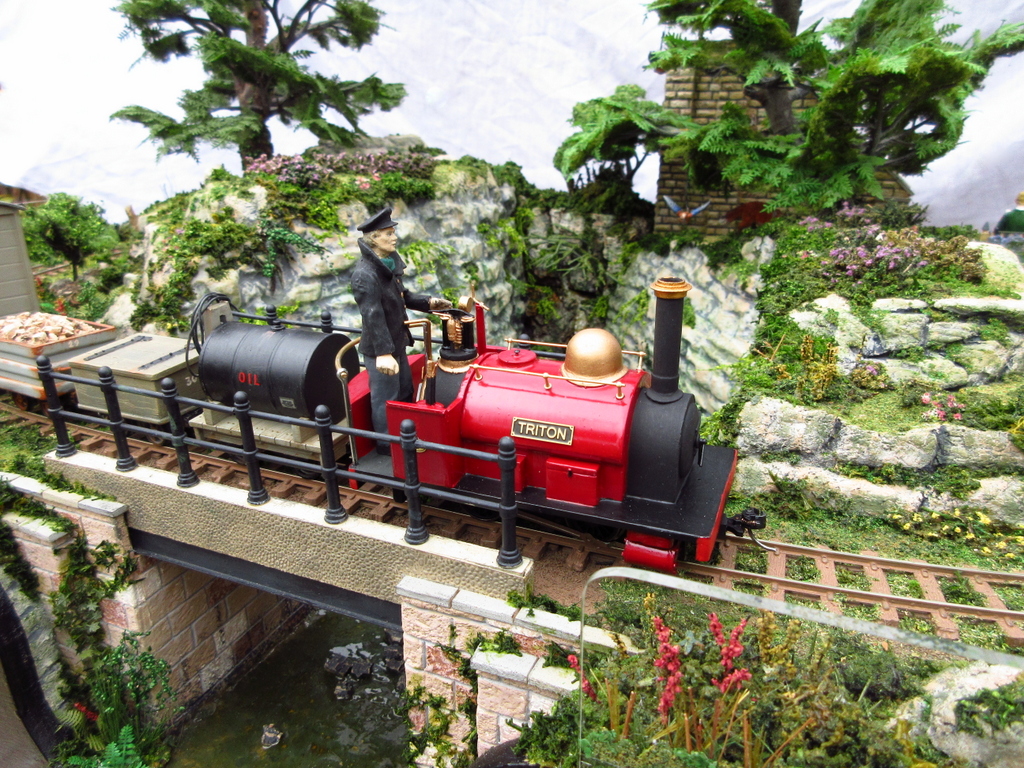
The third loco "Triton" before being painted.

The fifth loco "Quinto" under construction.

No.1 "Proteus" is a Harlequin kit.  As it was the first one I had built, I made a few mistakes along the way, I used the wrong sized brass wire for some of the cab details, and promptly ran out of it, meaning I had to ask Michael at Smallbrook if he could send me some more bits, which he kindly did.  When I had made it, I knocked the loco off my desk breaking off the chimney, damaging the handrails and the brake handle, so I had to get more bits!  After all the time modelling little scale locos and rolling stock, you have to get used to handling the larger models, and I regularly accidentally catch a loco and knock it over. 
The chassis I used for this loco is the latest Chinese Hornby Class "0F" chassis, but the underside of the boiler only has recesses for the earlier model (which has less electrical components on), so it was quite a squeeze to get in, and some of the underside of the boiler had to be drilled out carefully.   The saddle tank is weighted with lead so it it quite top heavy.  

No.2 "Jiro" is a Columbine kit.  Very easy to build, that is, unless you are taking a high dose of tablets at the time, like I was, which leads to things "not going on very straight"!  There are only a dozen or so cast resin parts, the footplate, boiler, tanks (which have lead beads in them for added weight), cylinder covers, cab front and back, cab sides, brake lever, dome and chimney, and a few small brass parts some of which you have to cut and bend.

No.3 "Triton" is a Pierrot kit and quite a small loco.  The design is based on a Hunslet "Alice" class loco.  There are many extra detail parts in the cab on this model, some quite fiddly to do.

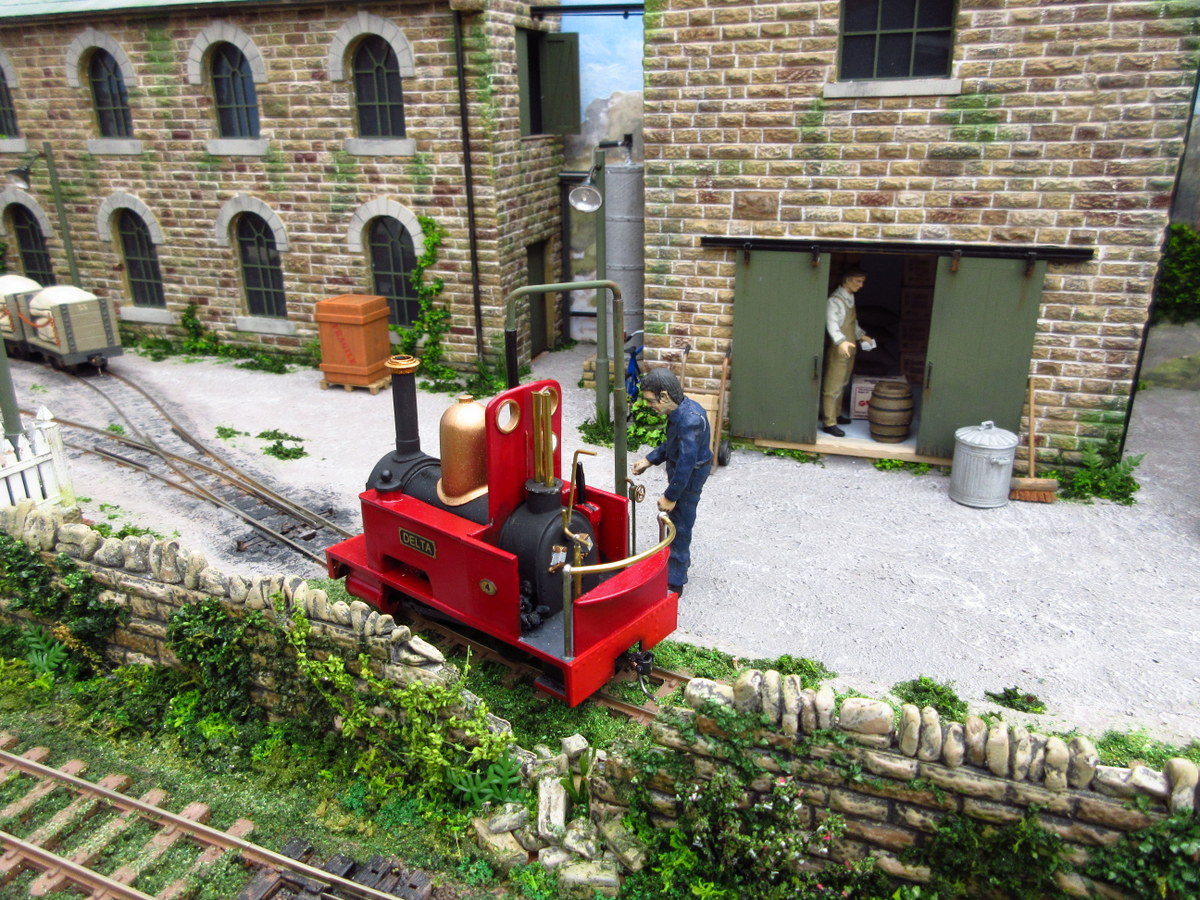
No.4 "Delta", is another Columbine kit.  To distinguish it from the other Columbine, I painted the boiler barrel black.  Luckily, I wasn't on too many drugs this time.

No.5 "Quinto", a Katie kit.  Based on the design Sir Arthur Heywood built for the Duke of Westminister for his estate at Eaton Hall.  However, I changed the front and rear cab sheets by making new parts from plasticard, which many Heywood followers would not appreciate.  I just wanted something that looked "beefier".  The Roscoe lubricator attached to the smoke box has to be handled and cleaned-up very carefully, otherwise it will break (like mine did).

Link to: Smallbrook Studio Heywood kits (by the way, I have no attachment to this firm other than as a satisfied customer).

That's about it at the moment for the locomotives.  I would like to build one or two different new locos in the near future, but I will have to wait and see what develops.

Tuesday, 27 March 2018

Wagons for Longstone

Wagons for Longstone


There are several wagon kits for sale in the Smallbrook Studio and Sidelines ranges and I have collected a few of them (some still to be made) for use on Longstone.

These kits are usually made of resin and are supplied with wheels.  In the case of Smallbrook Studios  they come with tension lock couplings.  I have continued to replace the couplings with Kadee's.  The kits are basically a body moulding, chassis frame moulding, and wheels, - very simple to make.

The mouldings are thoroughly washed to clean off any residue, then glued together with superglue.  I have used Humbrol enamel primer, then Humbrol enamel matt top coats with added weathering, but I believe good quality acrylic paints can also be used.

 The Sidelines three plank open wagon kit.  Cleanly moulded and easy to assemble.

Vehicle No's 21 and 22 are Sidelines SL501 Covered Vans.

3-plank open wagons No's 25 and 26 are Smallbrook Studio kits running on "00" scale Dapol 10ft chassis. 

No. 29. This steel mineral wagon, which I bought ready-made from a friend may be a Rockley Bottom product from a few years ago.


No.30, A Tool Chest wagon, possibly from the same manufacturer.


No's 31 - 38.  Bulkhead Flat wagons made by Sidelines (SL201).


No.40, a Sidelines SL103 Tool wagon.


I bought this wagon, No.41 from Ebay and I believe it to be a Shapeways product.

No.42, a single plank version of the above.

No. 46, a old Sidelines SL502 3-plank wagon.


No.50 an old Sidelines SL500 flat wagon.


Another Sidelines model, SL007 Tank wagon, as yet to be numbered.


I hope to add a few more wagons to the LWR stock in the next few months.

Tuesday, 13 March 2018

Coaches for Longstone

Some more about the Coaches


"Jiro" with the first bogie carriage, No.12.

When I started modelling in 1:24 scale (April 2016) I found a distinct lack of passenger coaches in the kits available.  The type I wanted to model were enclosed, or semi-enclosed vehicles suitable for transporting visitors two or three miles.  As far as I could see, there was no way around it other than to build my own vehicles.

I had loads of 4mm Wills materials sheets from my 009 days, so I looked at the various types and decided to use them for building coach bodies along with Plastruct angle and Evergreen strips. The Wills sheets are quite strong, and over 1mm thick, so seemed ideal for building the bodies.  I mainly use the Tongue & Groove Boarding and Sheet Roofing sheets.

Coach livery is Humbrol Satin 195 "Dark Green" and 71 "Oak" Cream, with a mixed Cherry Red line and Matt 27 "Sea Grey" roofs.

The tension lock couplings are all removed from "00" scale chassis and replaced with Kadee couplings, sometimes the NEM362 type, depending on what fits best.

Kadee NEM coupling fixed on a Lima bogie.


Coach No.12 

I bought a second hand "00" scale Lima PTA wagon and removed the body.  This would be the chassis of the first coach, 148mm long.  Using thick 1mm plastikard for the floor, I used 6mm Plastruct angle to create a frame around it as a basis for the body sides.  Then using the Wills materials built up the body, meticulously creating window frames from old Peco mouldings from a Station House kit, and using thin clear "Plastiglaz" for the window glasses.  The removable roof is held in place by two brass pins, so I can access or re-position passengers.

  The first bogie coach under construction, using the Wills materials sheets.

The completed bogie coach with "Proteus".


Being new to the scale I sized the coach as best I could, I was pleased with it, and initially the coach appeared the right size.  But when I ran it with other items of stock, it seemed to dwarf everything.  So the decision was made to re-build it lower and narrower.

Un-daunted, I dismantled the coach three months after I built it.

A photo in the workshop being re-built.

Newly re-constructed coach 4mm narrower and 7mm lower with stronger glazing too.

The coach is more in proportion to other items of stock now and runs well.

Coaches 14 & 15

Next, two 4-wheeled coaches were built in the same way, with the Wills materials.  These would be open above the waist and sit on "00" scale Dapol 10ft Wagon chassis.  The bodies are 75 mm long x 68 mm high and 50 mm wide.

Another workshop photo, with one of the four-wheeler's under construction.

The completed vehicles on the maintenance shed diorama.  Roof's are detachable, and held in place by "L" shaped brass pins.  Couplings are Kadee NEM  pocket type.

Another photo on the maintenance shed diorama being hauled by "Proteus".

I built the bodies to the same height and width as the re-built bogie coach, but because they sit lower down on the wagon chassis they looked too low, with the roof line about 5mm lower than the bogie coach!  So, after much deliberating, I am at present re-building these too, saving as many parts as I can for re-use.

Here is coach No.15 before re-painting with new end panels and raised sides.  I have decorated the cant rail to detract from the vehicles"boxiness".

This photo shows the height difference with original coach 14 of the same type, and No.15 is now more in proportion with other passenger stock.


Completed re-built coach No.15


Coaches 16 & 17

In mid 2017 Smallbrook Studio introduced a coach to their range of Heywood kits it was called a Decauville Inspection Coach, a lovely kit, full of character.
Link to: Smallbrook Studio Gn15 Heywood Kits
It is probably designed for engineers to travel the line and check-out the condition of track and works areas.

I saw it as a new passenger vehicle, and my wife bought two of these kits for a birthday present.  They are very tall, so I reduced them in height by 10 mm, reducing end windows, and they are now in service.

Another workshop photo.  The Decauville coaches being prepared for painting.

Coach No.17


The pair of completed coaches.


Coach No. 20

Another "workshop" image, showing the body of coach No.20 receiving paint. 

Coach No.20 is a model made from card.  It started off as a kit by "Norfolk Heath Works" - a bogie passenger/open wagon vehicle.  I added a guards compartment where the open wagon section should have been, and also added a roof.  The curly valance is York Modelmaking 7mm scale canopy valancing.

The coach when completed.

It is mounted on some  Parkside Dundas PA38 LNER Diamond Frame bogies, which I found were tricky to mount the wheels in.  They were too loose and wouldn't hold in the bogie frames, so the only thing to do was glue-in some brass bearings.  I am still not happy though as the coach isn't a very good runner.  I may have to get some other bogies for it.

No.20 seen on the Longstone Maintenance Shed diorama.


Coach No. 11

I liked the general idea of coach No. 20 with half passenger compartment and half guards cabin, so decided to make a plastic model of a similar type of vehicle, built in the same way as bogie coach No.12 using the 4mm Wills Materials.

Some of the main parts for the new vehicle.  Part made body, guards van sides and a Lima PTA wagon chassis with new Kadee couplings.

The vehicle under construction, March 2018 .

Above and below: The completed coach on the maintenance shed diorama.